Hello there! How’s it going? 😀
In one of my recent post I shared how we can pass API key in headers in External Services, and the basis of that solution was the new Named Credentials set up. In Winter ’23, Salesforce has completely reimagined the set up process for Named Credentials. Oddly enough, the new Named Credentials DO NOT support Username and Password auth out of the box (silly, I know) but there is a very interesting workaround.
But let’s first quickly catchup on what is Username and Password authentication.
Basic Authentication Protocol
Username and password based authentication is better known as Basic authentication protocol where username and password is passed as a base64 encoded string in the request header. The username and password are concatenated with a colon (:), then encoded to base64 encoded string and passed as a value to the ‘Authorization’ header.
Example:
myUsername:myPassword → base64 encoding applied ⇒ bXlVc2VybmFtZTpteVBhc3N3b3JkCg==
GET https://externalapp.com/data HTTP/1.1
Authorization: Basic bXlVc2VybmFtZTpteVBhc3N3b3JkCg==NOTE: The fact that a base64 string can be easily decoded, makes the Basic Auth protocol less secure, jfyi.
Alright, now let’s see how we can set up Basic auth protocol in the new Named Credentials.
Setup
In the new Named Creds set up, you’ve to first set up an External Credential (introduced in Winter ’23).
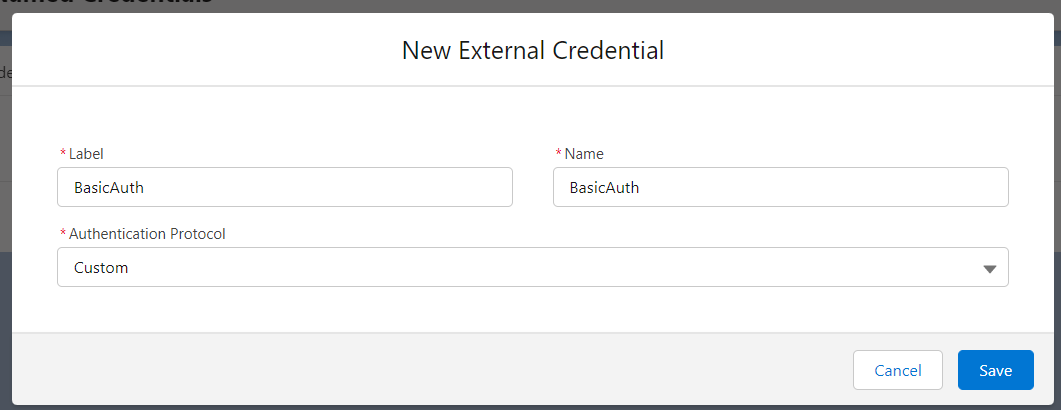
Step 1: Create External Credential.
- Go to Setup -> Named Credentials.
- Click on the External Credentials subtab, then click New.
- Enter a descriptive Label.
- Enter
- Set the Authentication Protocol to Custom.
- Click Save.
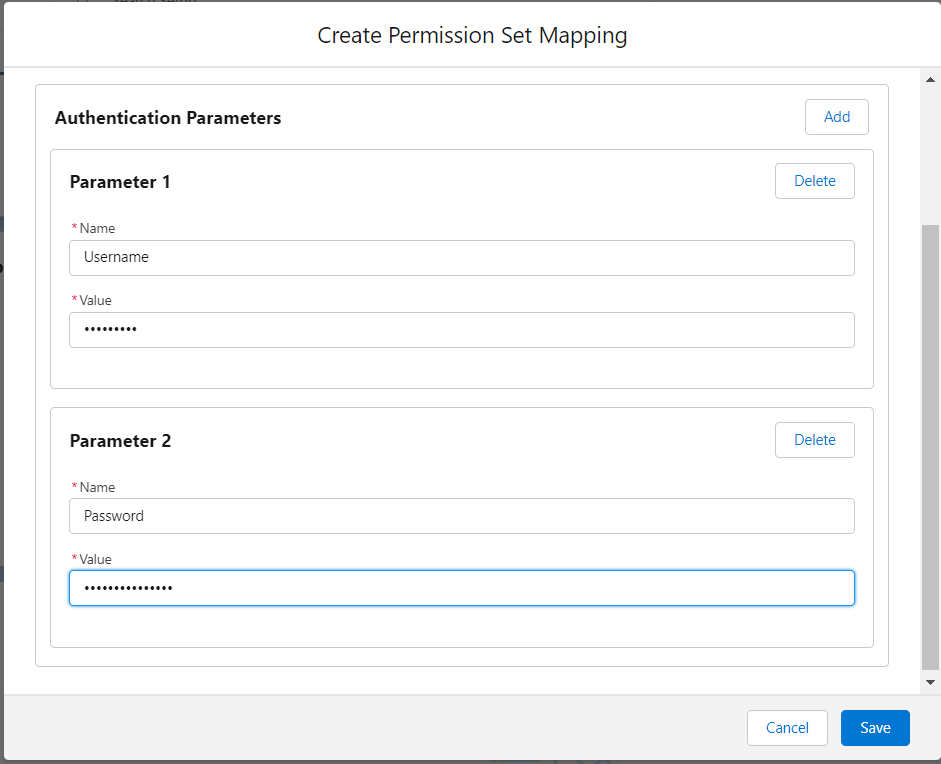
Step 2: Create Permission Set Mapping to store the API key.
- When viewing the External Credential, click New under Permission Set Mappings.
- Select a Permission Set that users will need to access this secret value. (Note: you may want to create a new Permission Set for this purpose.)
- Set the Sequence Number in case a user happens to have multiple Permission Sets used in multiple Permission Set Mappings. This number determines which mapping “wins” and gets used for the callout, sorted from lowest to highest.
- Leave the Identity Type set to Named Principal. This indicates that Salesforce users will share the same API key, and they don’t have unique access to the external service.
- Click Add to create an Authentication Parameter, and enter “Username” in the Name.
- Enter the username in the Value of the Authentication Parameter and click Save.
- Click Add to create another Authentication Parameter, and enter “Password” in the Name.
- Enter the password in the Value of the Authentication Parameter.
- Click Save.
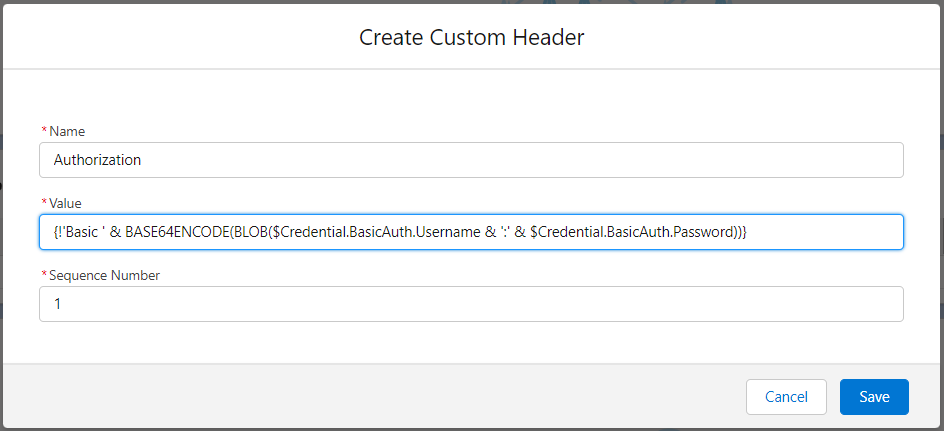
Step 3: Adding Custom Header
- When viewing the External Credential, click New under Custom Headers.
- Enter “Authorization” in the Name of the header.
- Enter the following Value:
{!'Basic ' & BASE64ENCODE(BLOB($Credential.BasicAuth.Username & ':' & $Credential.BasicAuth.Password))}. - Leave the Sequence Number set to the default, since we don’t need to worry about the order of headers in this case.
- Click Save.
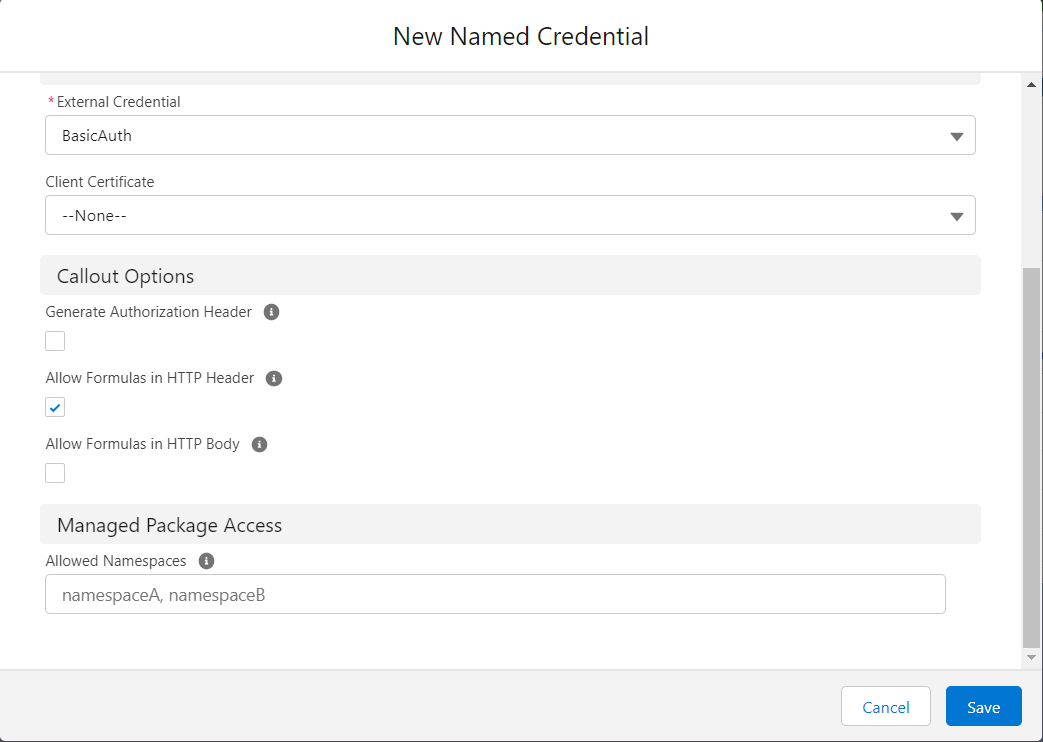
Step 4: Create the Named Credential.
- Click the Named Credentials subtab, then click New.
- Enter a descriptive Label.
- Enter a developer Name.
- Set the URL to the correct endpoint.
- Select the External Credential created in the prior step.
- For this example, it’s important to uncheck the Generate Authorization Header setting. Instead, this will be handled by the Custom Header we defined in the prior steps.
- Check the Allow Formulas in HTTP Header setting as we’re formula functions in header values.
- Click Save.
And we’re all set!
Hope you find this one useful! Catch you in the next one! ✌
And thank you for being an awesome reader! Subscribe to this blog for receiving all the latest updates straight to your inbox. 🙂

The line “Mark the Allow Formulas in HTTP Header setting as we’re not using any formula functions in header values.” doesn’t quite make sense. Do you mean to say to enable this setting because formulas ARE being used in the header?
LikeLike
Thanks for mentioning, Chris. A silly typo!
Updated the post 🙂
LikeLike
Hello, I have a doubt regarding how to use the Custom Header you made in Step 3.
How do you use the Custom Header you created, in the apex class to generate the header you need in the callout?
LikeLike
I haven’t tried it but my guess is it will be automatically handled by the platform and the header will be generated automatically. You wouldn’t need to do anything in the Apex.
LikeLike
Very good explanation. can you please provide example , how to us this in apex call out?
LikeLiked by 1 person
Thanks for the instructions Narender!
LikeLike
Most welcome! 🙂
LikeLike
Thank you for this well explained article.
We have an integration using legacy Named Credential with username/password sent in the body by accessing them as {!$Credential.Username} and {!$Credential.Password} within Apex.
When this is changed to the new External Credential approach, the value of the password is being encoded. E.g., Any ampersand in the password becomes & which causes the external system to fail authentication.
Would you suggest any configuration or workaround to prevent this encoding?
LikeLike
The last line in the second paragraph should read as
‘Any ampersand in the password becomes “& amp ;” which causes the external system to fail authentication.’
Looks like its was decoded in the previous post.
LikeLike
For the time being, you can just manipulate the password string.
Also, I think you should raise this a case with support. Hopefully they’ll consider this as a bug and fix it.
LikeLike
Hello Aswin.
I’m Getting the same issue, did you solve it?
LikeLike
No resolution as of now.
We’ve raised a case with Salesforce support and waiting on them.
LikeLike
So I’ll try to raise a case as well. I will write here any update on that.
LikeLike
Just to inform.
It worked for me.
We have to use the formula in apex class like that:
String body = ‘client_id={!$Credential.TB3_STS_TOKEN.clientId}’
+ ‘&client_secret={!$Credential.TB3_STS_TOKEN.clientSecret}’
+ ‘&grant_type=client_credentials’;
where “TB3_STS_TOKEN” is the name of the External Credencials and “clientId” and “clientSecret” are the name of the Authentication Parameters (You can use other names if you want)
LikeLike
This has been opened as a known issue https://issues.salesforce.com/issue/a028c00000smJNNAA2/authentication-parameters-which-are-sent-via-named-credentials-are-sent-html-escaped
LikeLiked by 1 person
Hi, I am not a DEV and I am trying to setup a declarative integration using Microsoft Azure and Flow builder. I’ve tried a couple of ways to create these External and named credentials, however It seems the authentication is not passed to the endpoint to get service (I also didn’t find a way to debug it).
So do you know if is possible to setup this integration? All examples I’ve found on internet is no authentication or passing parameters by header (Azure accept it in body).
Flow ->> Action ->> Auth. Azure Microsoft (I believe using external credential) ->>> Get service ->>>> Flow Screen process.
Thank you.
LikeLike
Reading from the documentation, it looks possible.
You will have to use “Authorization code grant” process.
LikeLike